


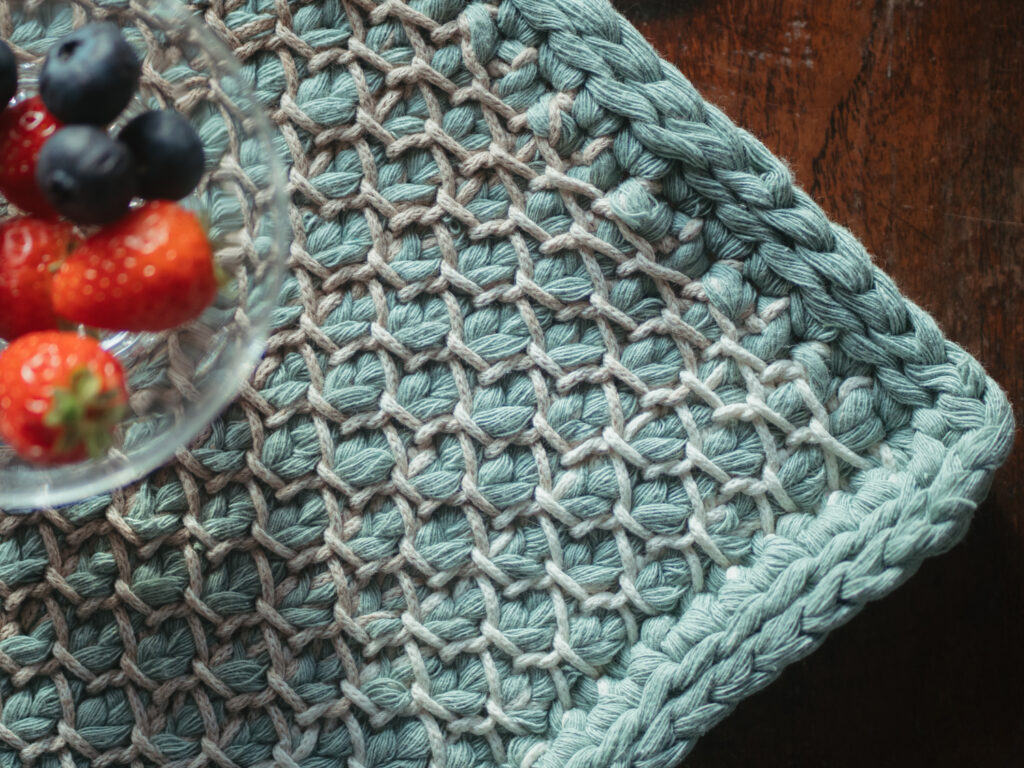
Protect your table with style! If you need a placemat to nibble on something at an outdoor table, this week's free pattern is your salvation. It's designed by Sheep Days and made with Rubí Imagina and Rubí Nudos Urdimbre. Don't miss it! We show you the step-by-step with its pattern and a video as support to learn how to crochet the honeycomb stitch.
MATERIALS
- Tunisian crochet hook 10 mm [US 15] or the size needed to obtain the correct gauge.
- Rubí Imagina (80% recycled Cotton / 20% Polyester. 250 g; 200 m) color 104.
- Rubí Nudos Urdimbre (80% recycled Cotton / 20% Polyester. 500 g; 140 m) color 010.
- A finer crochet hook (6 to 8 mm) to weave in ends and a stitch marker.

BEFORE STARTING
Gauge
11 sts x 8 Rows = 10 x 10 cm (4 x 4“) in honeycomb stitch (see techniques and construction)
Measurements
Width: 28 cm / 11 in.
Length: 38 cm / 15 in.
Abbreviations
A: Rubí Imagina.
B: Rubí Nudos Urdimbre.
ch: chain(s).
(L): pick up stitches.
(C): bind off stitches.
st: stitch(es).
sc: single crochet.
sl st: slip stitch.
Tss: Tunisian simple stitch.
Trs: Tunisian reverse stitch.
Rnd: round.
STEPS TO MAKE A CROCHET PLACEMAT
The body of the placemat is worked in Tunisian honeycomb stitch; you will work the first part of each Row (pick up stitches) only with the yarn (A) and the second part (bind off stitches) with both yarns. At the end of each Row, cut B, leaving about 10 cm of yarn to weave in at the end.
When you have finished the body of the placemat, you will work two rounds of crochet (normal) around with yarn (B) to finish the piece with a solid color border.
Honeycomb Stitch
With A and B together, chain an odd number of stitches, cut yarn B leaving about 10 cm to weave in and work as follows:
Row 1(L): With A only, pick up all stitches in the back bump of each chain.
Row 1(C): Add B and work with both yarns, yarn over and pull through one loop; *yarn over and pull through two loops* repeat from * to * until the end. “Cheat” the last step as shown in the video to make the first stitch of the next row a Tunisian reverse stitch. Cut yarn B leaving about 10 cm to weave in.
Row 2(L): With A only (remember that you already have the first st on the hook and it is a Trs), *1Tss, 1Trs* repeat from *to* until the end.
Row 2(C): Add B and work with both yarns, yarn over and pull through one loop; *yarn over and pull through two loops* repeat from * to * until the end. Cut yarn B leaving about 10 cm to weave in.
Row 3(L): With A only (remember that you already have the first st on the hook and it is a Tss), *1Trs, 1Tss* repeat from *to* until the end.
Row 3(C): Add B and work with both yarns, yarn over and pull through one loop; *yarn over and pull through two loops* repeat from * to * until the end. “Cheat” the last step as shown in the video to make the first stitch of the next row a Tunisian reverse stitch. Cut yarn B leaving about 10 cm to weave in.
Repeat Rows 2 and 3 as many times as indicated.
INSTRUCTIONS
You will see that Rubí Imagina (A) has 7 small skeins, we will start with the one at the end and change it to create the dégradé effect.
With both yarns and starting with the first color of A, chain 27, the last one will be the first stitch. Cut B leaving 10 cm of yarn to weave in later.
Work honeycomb stitch for 3 rows. Change to the second color of A in the last step of the last Row.
Work 4 Rows of honeycomb stitch with this mix of colors and change to the next color of A. Repeat until you reach the last skein of A. Work 3 Rows of honeycomb stitch and bind off all stitches following the stitch sequence that would correspond (watch the video to see how to do this so that both sides are the same).
In total, you will have worked 26 Rows.
FINISHING
Cut A leaving 10 cm of yarn to weave in, secure the stitch on the hook (in B) with a stitch marker so you don't lose it, and with the finer hook, weave in all ends before continuing with the border.
BORDER
Place the stitch back on the 10 mm hook, chain 1 and work:
- 26sc along the long side of the placemat, ch 2 to mark the corner.
- 20sc into the front loop of the starting chains, work them as follows: (3sc, skip one ch)x3, 2sc, (skip 1ch, 3sc)x3. ch 2 to mark the corner.
- 26sc along the other long side, ch 2 to mark the corner.
- 20sc into the front loop of the bind-off chains, work them as follows: (3sc, skip one ch)x3, 2sc, (skip 1ch, 3sc)x3. ch 2 to mark the corner.
- Close the round with a sl st.
Work 27 sl st, ch 1 in the corner, 22 sl st, ch 1, 28 sl st, ch 1, 22 sl st, ch 1, 1 sl st and finish with an invisible join.
Repeat from the beginning for the second placemat.
FINAL TOUCHES:
With the finer crochet hook, weave in any remaining ends. No blocking necessary.
FINAL RESULT


