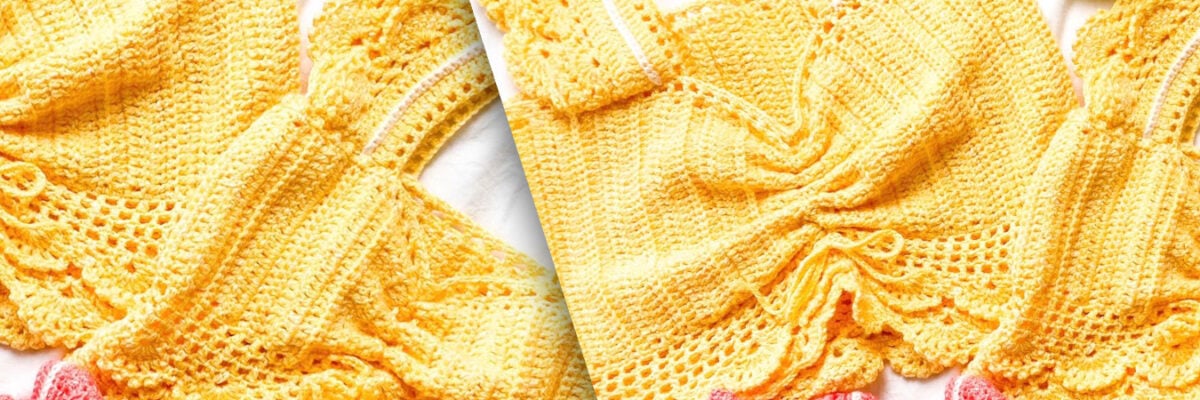
With 2 skeins of Rubí May Socks, you'll create a multi-colored top full of personality that will be a must-have in your little one's wardrobe this summer. Let's get started!
MATERIALS
Rubí May Socks color 001 (2 skeins)
Knitting needles size 4 and size 3 for the edges (neck and armhole)
Tapestry needle
Stitch holder pin
Stitch markers
Stitch holders

HOW TO KNIT THE PATTERN?
STITCHES, SYMBOLS AND ABBREVIATIONS
All in garter stitch.
STITCHES USED
Garter stitch: all stitches are knitted right side in right side rows and wrong side rows.
Eyelet: k2tog, yo
ABBREVIATIONS
st: stitch
row: row
k: knit stitch
p: purl stitch
k2tog: knit two stitches together
GAUGE
10 x 10 cm in garter stitch with size 4 needles: 26 sts and 48 rows
Difficulty: 3
Size: 7-8 years
STEP BY STEP
Front
With size 4 needles, cast on 106 sts. Always knit in garter stitch.
After knitting 4.5cm, in the next right side row, decrease 1 st on each side of the garment, 1 st from the edge, as follows: k1, k2tog, knit all stitches until 3 sts remain, then k2tog, k1. Make 6 more decreases on each side, in the right side rows, knitting in the same way every 4.5cm. 92 sts will remain and the garment will measure approximately 31.5cm.
Continue knitting in garter stitch.
ARMHOLES
At 32cm from the bottom edge of the garment and coinciding with a right side row, bind off the first 5 sts of the row and knit all stitches to the end. In the next wrong side row, bind off the first 5 sts of the row and knit all stitches to the end. 82 sts will remain.
Continue decreasing on each side, binding off stitches at the beginning of the right side and wrong side rows (as done in the previous 2 rows) the following stitches: 2 sts, 2 sts, 1 st, 1 st, 1 st, 1 st, 1 st. 64 sts will remain (18 sts have been bound off in total, 9 sts on each side of the garment).
Continue knitting in garter stitch for 10cm from the armholes.
Begin knitting the neckline. In the next right side row, knit 24 sts, bind off 16 sts, and knit 24 sts. In the next wrong side row, knit 24 sts. From this point, you will be knitting the right side of the front (the stitches corresponding to the left side are transferred to a stitch holder). To form the right side of the neckline, in the right side rows, bind off at the beginning of each row: 4 sts, 3 sts, 3 sts, 1 st, 1 st. In the wrong side rows, all stitches are knitted. 12 sts will remain.
Knit the 12 sts of the right shoulder until 15cm from the armhole. Bind off all stitches.
Resume the stitches from the left side. To form the left side of the neckline, in the wrong side rows, bind off at the beginning of each row: 4 sts, 3 sts, 3 sts, 1 st, 1 st. In the right side rows, all stitches are knitted. 12 sts will remain.
Knit the 12 sts of the left shoulder until 15cm from the armhole. Bind off all stitches.
BACK
With size 4 needles, cast on 116 sts. knit 33 sts, place a marker, knit (k2tog, yarn over) x 25 times (50 central sts), place a marker, knit 33 sts. In the wrong side row, k33, p50 of the eyelet pattern, k33.
Continue knitting in this manner, in garter stitch on the side panels with the eyelet pattern in the central panel between markers. After knitting 4.5cm, decrease 1 st on each side of the garment and 1 st from the edge, just like on the front. Repeat these decreases 6 more times every 4.5cm, just like on the front. At the end of the decreases, the garter stitch side panels will have 26 sts each, and the garment will measure approximately 31.5cm.
At the same time, in the right side rows, decrease 1 st on each side of the eyelet pattern by knitting k2tog after the first marker and before the second marker, 11 times distributed throughout the garment until reaching the neckline. At the end of the decreases, the central eyelet pattern will have 28 sts.
ARMHOLES
At 32cm from the bottom edge of the garment and coinciding with a right side row, bind off the first 5 sts of the row and knit all stitches to the end. In the next wrong side row, bind off the first 5 sts of the row and knit all stitches to the end.
Continue decreasing on each side, binding off stitches at the beginning of the right side and wrong side rows (as done in the previous 2 rows) the following stitches: 2 sts, 2 sts, 1 st, 1 st, 1 st, 1 st, and 1 st. 12 sts will remain in each garter stitch panel (18 sts have been bound off in total, 9 sts on each side of the garment).
At 10cm from the armholes, in a right side row, we will knit k12, bind off all stitches corresponding to the eyelet panel (28 sts, as all decreases for this panel will have been made) and knit k12.
From here, we will knit the left shoulder and leave the right shoulder on a stitch holder. Knit the 12 sts of the left shoulder in garter stitch until 15cm from the armhole. Bind off all stitches.
Resume the 12 sts of the right shoulder and knit in garter stitch for 15cm from the armhole. Bind off all stitches.
FINISHING
Sew front and back at the shoulders. With size 3 needles, pick up stitches around the neckline and knit a 4-row garter stitch border. Bind off all stitches.
With size 3 needles, pick up all stitches around each armhole and knit a 4-row garter stitch border. Bind off all stitches.
Sew the sides of the top from the armholes downwards, leaving an opening on each side at the bottom of 15cm. With size 3 needles, pick up the stitches of the openings and knit a 4-row garter stitch border and bind off all stitches.
FINAL RESULT