

How to join two crochet pieces without leaving a ridge?
There are several ways to answer how to join two crochet pieces without creating a ridge, but today we are going to focus on one of them: the slip stitch join.
The slip stitch is a simple technique for joining two crocheted pieces, and you only need your hook! With this join, you will get a clean, decorative, and ridge-free result when joining your pieces.
Benefits of the slip stitch join in crochet
The slip stitch is the ideal technique for joining crochet granny squares without creating a ridge. Why? Because it is not only especially simple but also very decorative.

Shall we talk about its benefits in detail?
Perfect motivation for crocheters
We know that sometimes, joining crocheted pieces can be a bit challenging, and you might even feel a bit lazy when you have all your granny squares finished and the only thing left to do is join them. Well, let us tell you something: this technique is perfect for those moments.
It's so easy to do that you won't even realize you're doing it, and the result is so beautiful that, instead of tiring you out, it will motivate you to continue with more enthusiasm.
You need very few materials
To use this technique, which will help you solve your question of how to join two crochet pieces without creating a ridge, you really don't need much, just your trusty crochet hook!
The beautiful thing is that you have complete freedom to choose the color of yarn you want to use. If you prefer to maintain a more uniform style, you can do it in the same color as the granny squares you've already crocheted, which looks very clean and elegant. But, if you feel more creative, why not play around a bit and try a contrasting color?
This way, you'll not only be joining the pieces, but you'll also be adding a unique and special touch to your design.
As versatile as you need
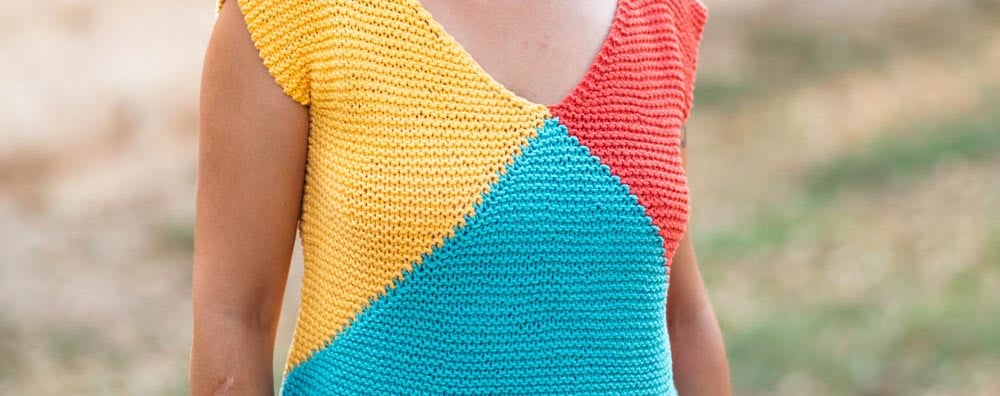
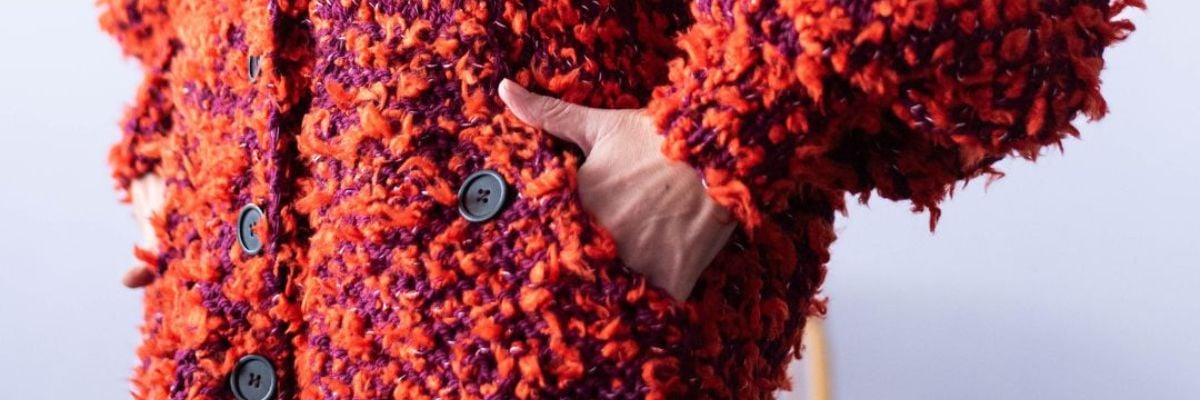
This technique is super versatile and not only will it help you join granny squares, but you can also use it to join the pieces of a sweater, a top, or whatever you can think of. Seriously, the possibilities are endless!
For any project you have in mind where you need to know how to join different parts, this type of join will be perfect for you. You'll love how it adapts to all kinds of patterns, trust us!
The most important thing about this technique is to spatially orient yourself in your project, pay a little attention, and before you know it, your project will be joined.
Clean and discreet finish
It's a wonderful way to answer the question of how to join two crochet pieces without creating a ridge, as it will give your project a super clean finish, almost as if the seam isn't even there.
The magic of the slip stitch technique is that it creates a flat and very discreet join, which means you won't have those bulky seams that sometimes hinder the final look of the pieces.
Everything is so smooth and delicate that, when you finish, you'll barely notice where you joined the pieces. And that's exactly what we want, isn't it? For the project to look impeccable and beautiful, without the seams stealing the show.
What materials do you need if you're wondering how to join two crochet pieces without creating a ridge?
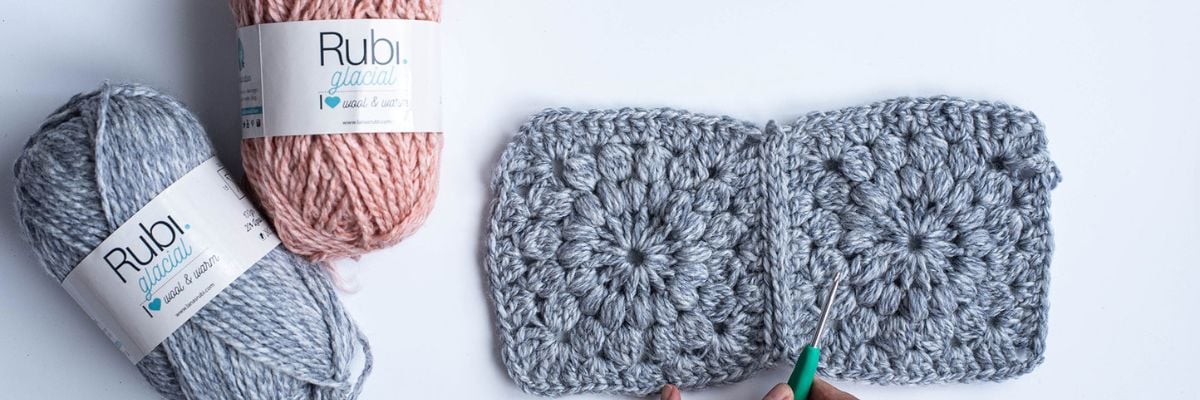
You can apply this technique with any Lanas Rubí quality. In this case, we have crocheted some granny squares with:
- Rubí Glacial in colors 002 and 005,
- and a 4.5 mm crochet hook.
Key steps for performing the slip stitch join

The slip stitch joining technique is done on the right side of the work. When you're wondering how to join two crochet pieces without creating a ridge, whether it's the granny squares of a blanket or, for example, the pieces of a sweater, keep this in mind.

Preparing the granny squares before joining them
To learn how to join two crochet pieces without creating a ridge, first take the two pieces you are going to join and place them wrong sides together, meaning wrong side to wrong side.
It is very important that you position the pieces correctly and check that all the stitches align. If necessary, use stitch markers to secure them.
Joining the pieces at the beginning
Once you have identified the first chain of each piece from where you will start joining, insert the hook from top to bottom into the piece closest to you.

As we mentioned earlier, keep in mind that when deciding how to join two crochet pieces without creating a ridge, this join looks great both with the same color you used for crocheting and with a contrasting color.
It's important to choose the color based on the desired outcome; if you prefer a more discreet join, use the same color; if you want to highlight this technique, choose a contrasting color.
To continue, with the joining yarn positioned between the two pieces to be joined, insert the hook through the center of the chain of the piece furthest from you, also in the same direction, i.e., from top to bottom, and pick up the yarn (the longer strand), and join both chains by making a slip stitch.
You have now joined both pieces at their beginning! Now you can continue with the process.

Continuing to join the granny squares
From this point on, follow these steps in this order to continue with the join:
- Always insert the hook through the center of the chain of the piece furthest from you. Always do it with the hook from bottom to top. You will have one loop on the hook.
- Then, insert the hook through the center of the chain of the piece closest to you, again, from top to bottom.
- You will then have 3 loops on the hook; take the yarn that is between both pieces, and pull it through all 3 loops.
- Continue and repeat the same process until you finish joining the pieces.
- Afterward, weave in any loose ends.

You'll achieve a very beautiful and decorative result, in addition to enjoying a technique so simple and quick that it will encourage you to finish your pending projects.
Frequently asked questions about how to join two crochet pieces without creating a ridge
Can I apply this joining technique to any project?
Yes, you can apply this technique to pieces that have edges as shown in the image, with chains, so that you can replicate the technique.
What type of projects is this technique ideal for?
For joining granny squares and transforming them into various projects, as they are very versatile. You can join different granny squares and turn them into a blanket, cushion cover, rug, sweaters, tops, bags... The slip stitch join will give it a decorative as well as practical style.
How can I achieve a flat, ridge-free effect?
An ideal option to complete your project and give it the perfect finish will be blocking. When applying it to your projects crocheted with granny squares and joined with slip stitch, it is advisable to block once the pieces are joined. This way, you will achieve a balanced and homogeneous result.
Is the tension with which this join is made important?
Yes, it is important. If you make the slip stitches with too much tension, you will create unsightly bumps or puckers. It is advisable to maintain consistent tension throughout the process and not make the stitches too tight. Afterward, during blocking, you can unify the result to achieve a perfect finish.
Now you know how to join two crochet pieces without creating a ridge! Remember that in our online store you will find all the yarns and threads you need for your projects. And if you're not already, follow us on social media to stay up to date with all our news and, most importantly, so we can see your amazing projects!


