


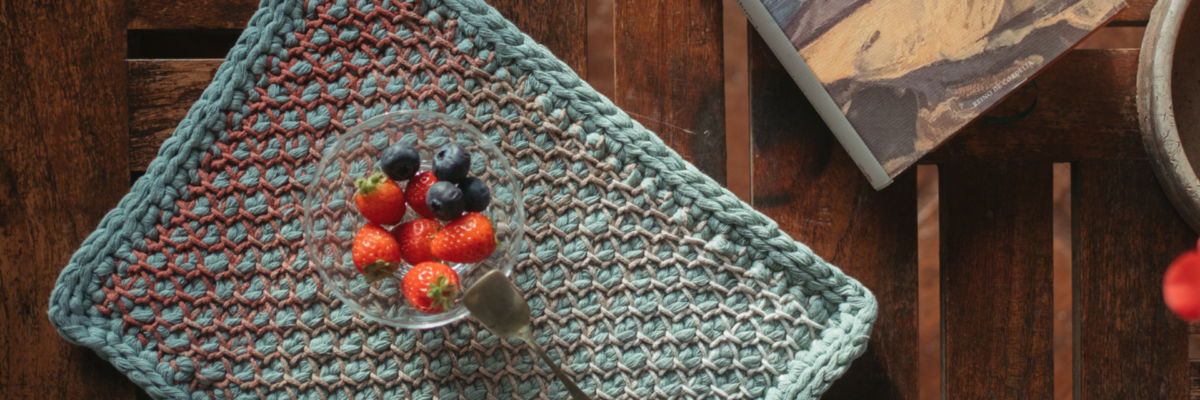
If this cold affects us, imagine how it affects babies. At Rubí, we want the little one in the house to feel comfortable in their crib, and that's why we're giving you the free pattern for the Blue Baby Blanket, designed by Gloriarte.
MATERIALS
- 4 skeins Rubí Bambino color 5.
- 2 skeins Rubí Bambino color 2.
- 4.5mm crochet hook.
- Scissors.
- Yarn needle to hide yarn tails.

BEFORE YOU START
Abbreviations
ch: chain
dc: double crochet.
sc: single crochet.
sl st: slip stitch.
tr: treble crochet.
BABY BLANKET PATTERN
The central part, in blue, is worked in back-and-forth rows.
It consists of 3 stripes:
Short stripe, 3 rows, numbers in black in the chart.
Lacy stripe, 3 rows, in pink in the chart.
Long stripe, 7 rows, numbers in green in the chart.
They are worked in series as follows:
Short stripe, lacy stripe, long stripe, lacy, short, lacy, long, lacy, short, lacy, long, lacy, short, lacy, long, lacy, short…
We make a total of 25 stripes. (detailed description of each row below, in the instructions)
The border, in white, is worked in the round.
DETAILED INSTRUCTIONS
Body of the blanket.
Blue color
Make a foundation of 113 ch.
Short Stripe
Row 1: 2 ch (counts as 1 dc), 1 dc in each stitch.
Row 2: 2 ch (counts as 1 dc), *ch, skip 1 stitch and 1 dc in the next* repeat *_* until the end of this row.
Row 3: 2 ch (counts as 1 dc), 1 dc in each stitch.
Lacy Stripe
Row 1: 1 ch (turning chain, does not count as a stitch) 1sc, *5 ch, skip 3 stitches and 1 sc in the next* repeat until the end of this row.
Row 2: 3 ch (counts as 1 dc), 2 ch, make 1sc in the arch formed by the 5 ch of the previous row, *3 ch, 1 dc in the same stitch (sc worked in the arch), 1 sc worked in the next arch formed by the 5 ch of the previous row* repeat *_* until the last arch of the previous row, 2 ch, 1 dc in the sc of the previous row.
Row 3: 1 ch (turning chain, does not count as a stitch) 1sc, *3 ch, 1 sc worked in the 3 ch of the previous row* repeat until the end of this row, 3 ch, 1 sc worked in the initial 3 ch of the previous row, which counted as the first dc.
Long Stripe
Rows 1, 2 and 3: 2 ch (counts as 1 dc), 1 dc in each stitch.
Row 4: 2 ch (counts as 1 dc), *ch, skip 1 stitch and 1 dc in the next* repeat *_* until the end of this row.
Rows 5, 6 and 7: 2 ch (counts as 1 dc), 1 dc in each stitch.
Repeat these stripes until you have a total of 100 rows, or 25 stripes (which are 99 rows plus the first chain row, foundation row), following the series: long, lacy, short, lacy, long, lacy, short… keeping in mind that we start by working 1 short stripe and must also end with 1 short stripe. The blanket has a total of 7 short stripes, 12 lacy stripes, and 6 long stripes.
Border or Edging
White color
Turn the blanket to the left, with the longest side facing up, and begin at the same starting point where we started working the body of the blanket in blue. Take the first chain of the 113 ch foundation and make the border as follows:
Row 1: 1 ch (turning chain, does not count as a stitch) 2sc, make 2 sc for each dc and 1 sc for each sc. When you reach the corner, make 1sc, 1 ch, 1 sc in the same space (do the same for all corners), now work the short side of the blanket, skip 1 stitch and in the next, make 1 sc, make a total of 111 sc, skip the last stitch and make the second corner the same as the first.
Finish the other 2 sides the same way you did these 2.
The chart shows in detail how to make this first row of sc. In total, on the longest side of the blanket, you should have 177 stitches, and on the shortest side, you should have 113 stitches (the ch of each corner is shared on both sides):

Row 2: 3 ch (counts as 1 dc), 1 dc in the same stitch (we will call these 2 dc a V-stitch), this V-stitch is part of the first corner, *skip 1 stitch and in the next make 2 dc (V-stitch)* repeat *_* until you reach the corner and make the corners as follows:
In the space formed by the ch, make 1 V-stitch, 1 ch, 1 V-stitch. Finish the last corner by making 1 V-stitch, 1 ch and close with a sl st.
Row 3: 3 ch (counts as 1 dc), 1 dc in the same stitch (V-stitch), this V-stitch is part of the first corner, make 2 dc (V-stitch) in each V-stitch of the previous row until you reach the corner and make the corners as follows:
In the space formed by the ch, make 1 V-stitch, 1 ch, 1 V-stitch.
In the last corner, make 1 V-stitch, 1 ch and close with a sl st.
Row 4: 3 ch (counts as 1 dc), 1 dc in the same stitch (V-stitch), this V-stitch is part of the first corner, make 2 dc (V-stitch) in each V-stitch of the previous row until you reach the corner and make the corners as follows:
In the space formed by the ch, make 1 V-stitch, 1 ch, 1 V-stitch.
In the last corner, make 1 V-stitch, 1 ch and close with a sl st.
Row 5: 3 ch (counts as 1 dc), 2 dc in the same stitch, 1 ch, *skip one V-stitch and in the next make 3 dc (group of 3 dc), 1 ch* repeat *_* until you reach the corner and make the corners as follows:
In the space formed by the ch, make 3 dc, 1 ch, 3 dc.
In the last corner, make 3 dc, 1 ch and close with a sl st.
Row 6: 1 sl st in the 2nd dc, to position ourselves in the center stitch of the group of 3 dc from the previous row, make 3 ch (counts as 1 dc), 1 dc, 1 ch, 2 dc (we will call this a W-stitch), in the next group of 3 dc from the previous row make 2 dc, 1 ch, 2 dc (W-stitch). Make 1 W-stitch in each group of 3 dc from the previous row, including those that form the corners.
In this row, the corners vary in how they are worked compared to the other rows, as you continue to make 1 W-stitch for each group of 3 dc, without "forming" a corner as such. When you reach the end of this row, close with a sl st.
Row 7: Make 2 sl st to position ourselves in the central ch of the W-stitch from the previous row and make 3 ch (counts as 1 tr) and 2 tr, 1 sc in the ch of the next W-stitch, *9 tr in the next W-stitch, 1 sc in the next W-stitch*, repeat *_* until you reach the corner and make the corners as follows:
·Corners 2 and 4: Make 3 tr in the last dc of the W-stitch from the previous row, 9 tr in the ch (corner), 3 tr in the first dc of the W-stitch from the previous row. Continue the side by making 1 sc in the same W-stitch (in the central ch of the W-stitch) and continue the series: 9tr, 1sc, 9 tr, 1 sc… until the next corner.
·Corner 3: Make 3 tr in the first W-stitch (in the central ch of the W-stitch) of the previous row that forms the corner, 9 tr in the ch (corner), 3 tr in the other W-stitch (in the central ch of the W-stitch) that forms the corner. Continue the side with the series: 1 sc, 9 tr, 1 sc, 9 tr… until the next corner.
· First corner: Make 3 tr in the W-stitch of the previous row that forms the corner (in the central ch of the W-stitch), 9 tr in the ch (corner) and close with a sl st.
Fasten off and hide yarn tails.
Block or carefully iron, following yarn instructions, for best results.
Symbols:

Charts:
Body of the blanket, blue color:

Border or edging, white color:

Detail of corner 1 and beginning of the border:

Detail of corners 2 and 4 of the border:

Detail of corner 3:

General view of border start and corners:

FINAL RESULT


