


Santa Claus
Exclusive creation by Cucapuntoes
MATERIALS
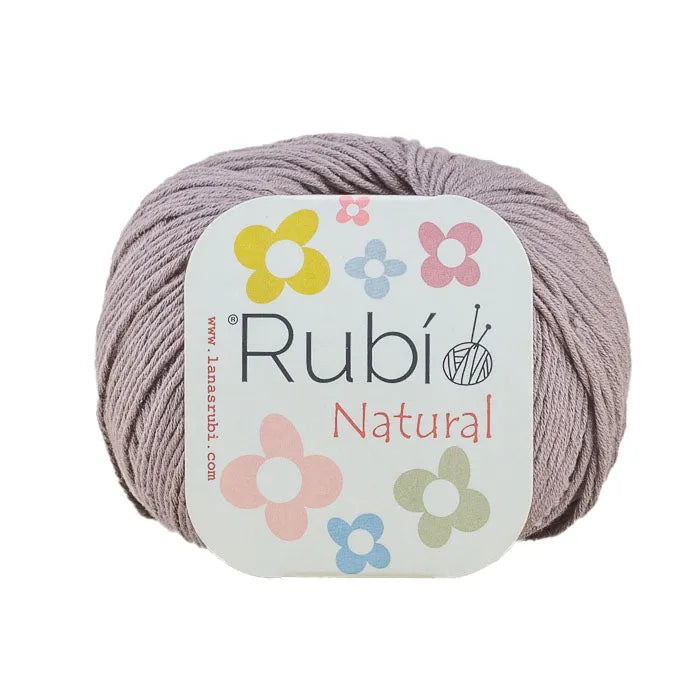
Santa Claus. Cotton yarn suitable for 3 mm needle Rubi Natural (50gr+/-155m), 2 skeins of red (027), black (030), white (002), flesh (003)
2.5mm crochet hook
Synthetic cotton stuffing
Stitch marker or a piece of yarn in a different color to mark the beginning of each round
Scissors and tapestry needle
Optional bell.
Choose your colors through our online store.
FINAL RESULT


PATTERN
ABOUT THE PATTERN
It is approximately 30 cm tall from feet to head.
It is crocheted in a spiral (continuous rounds), except for parts where it indicates to crochet in rows, i.e., back and forth.
STITCHES USED AND ABBREVIATIONS
ch: chain
mr: magic ring
sl st: slip stitch
hdc: half double crochet
dc: double crochet
rsc: crab stitch
pop: popcorn stitch (5 stitches)
inc: increase
dec: decrease
r: round
[…]: repeat sequence
(..): number of stitches
The relief stitch used is crocheted by making a first round of double crochet stitches, in the second round the same number of double crochet stitches are made, alternately wrapping the stitches of the preceding round, one in front and one behind, thus achieving a relief effect.
BODY
Start with the feet in black.
1r 6sc in mr (6)
2r 6inc (12)
3r [1sc, 1inc] x6 (18)
4-12r 18sc (18)
Change to red
13r [2sc, 1inc] x6 (24)
14r 24sc (24)
15r 1sc, 1inc, [3sc, 1inc] x5, 2sc (30)
16r 30sc (30)
17r [4sc, 1inc] x6 (36)
18r 36sc (36)
To finish, make a sl st and cut the yarn. Then make another identical piece, this time without cutting the yarn at the end. Bring both pieces together and join them with 4sc, starting from the sl st of the last round of the piece we cut earlier.
Once joined, continue working around the edge and place the stitch marker in the first stitch we make.
19-20r 64sc (64)
21r 6sc, 1inc, [2sc, 1inc] x6, 12sc, 1inc, [2sc, 1inc] x6, 6sc, 1dec (77)
22-29r 77sc (77)
Close with a sl st and cut the yarn.
To make the jacket border, we will work in rows with red yarn following these instructions:
Chain 76 plus 2 for turning
Make 3 rounds of dc. Start by crocheting a dc in each ch from the third from the hook (77)
Make 2 ch, which will be our first dc, then crochet 76 front post/back post dc, alternating until the end of the row (77)
Make 2 ch and crochet 76 front post/back post dc as they present (77)
Fasten off and cut the yarn, leaving a tail of approximately 15 cm for sewing.
Continue with the body.
Place this strip (jacket border) over the body's edge that we were crocheting. With black yarn
30r 77sc picking up the stitches from the top of the strip and those from r29 of the body at the same time (77)
31-32r 77sc (77)
Change to red yarn
33r 1dec, 75sc (76)
34-37r 76sc (76)
Stuff the legs with synthetic cotton
38r 2sc, 1dec, [12sc, 1dec] x5, 2sc (70)
39-40r 70sc (70)
41r 16sc, 1dec, 33sc, 1dec, 17sc (68)
42r 16sc, 1dec, 32sc, 1dec, 16sc (66)
43r 66sc (66)
44r [9sc, 1dec] x6 (60)
45-46r 60sc (60)
47r [8sc, 1dec] x6 (54)
Continue stuffing and keep doing it little by little until the body is finished. The bell can be inserted now.
48-49r 54sc (54)
50r [7sc, 1dec] x6 (48)
51-52r 48sc (48)
53r [6sc, 1dec] x6 (42)
54r 42sc (42)
55r 2sc, 1dec [5sc, 1dec] x5, 3sc (36)
56r [4sc, 1dec] x6 (30)
57r 1sc, 1dec [3sc, 1dec] x5, 2sc (24)
Close with a sl st and cut the yarn, leaving a long enough tail for sewing.
Finish the jacket border by closing the opening with the red yarn we left for it.
With white yarn, make one round of 77sc and finish the work with another round of 77crab stitches. Cut the yarn, fasten off, and weave in the remaining tail.
HEAD
In flesh color.
1r 6sc in mr (6)
2r 6inc (12)
3r [1sc, 1inc] x6 (18)
4r [2sc, 1inc] x6 (24)
5r 1sc, 1inc [3sc, 1inc] x5, 2sc (30)
6r [4sc, 1inc] x6 (36)
7r 2sc, 1inc [5sc, 1inc] x5, 3sc (42)
8r [6sc, 1inc] x6 (48)
9r 3sc, 1inc [7sc, 1inc] x5, 4sc (54)
10r [8sc, 1inc] x6 (60)
11r 4sc, 1inc [9sc, 1inc] x5, 5sc (66)
12r [10sc, 1inc] x6 (72)
13-23r 72sc (72)
24r [10sc, 1dec] x6 (66)
25r 4sc, 1dec [9sc, 1dec] x5, 5sc (60)
26r [8sc, 1dec] x6 (54)
27r 3sc, 1dec [7sc, 1dec] x5, 4sc (48)
28r [6sc, 1dec] x6 (42)
29r 2sc, 1dec [5sc, 1dec] x5, 3sc (36)
30r [4sc, 1dec] x6 (30)
31r 1sc, 1dec [3sc, 1dec] x5, 2sc (24)
32r [2sc, 1dec] x6 (18)
Make a sl st to close the work and cut the yarn.
ARMS (MAKE TWO)
In flesh color.
1r 6sc in mr (6)
2r 6inc (12)
3-6r 12sc (12)
7r Left arm: 1pop (5dc in the same stitch closed together), 11sc (12)
Right arm: 4sc, 1pop, 7sc (12)
8-9r 12sc (12)
Change to red yarn.
10r Taking only the back loop. 12sc (12)
On the front loop, finish with white yarn by making 12sc (12), cut the white yarn, fasten off, and weave in the yarn tail.
11r Continue with red yarn [1sc, 1inc] x6 (18)
12-32r 18sc (18)
Stuff lightly until the end
33r Make 4sc, flatten the top and close both sides together with 9sc. Finally, cut the yarn leaving a long tail for sewing.
HAT
In red color.
1r 6sc in mr (6)
2r 6sc (6)
3r [1sc, 1inc] x3 (9)
4r 9sc (9)
5r [2sc, 1inc] x3 (12)
6r 12sc (12)
7r 1sc, 1inc [3sc, 1inc] x2, 2sc (15)
8r 15sc (15)
9r [4sc, 1inc] x3 (18)
10r 18sc (18)
11r 2sc, 1inc [5sc, 1inc] x2, 3sc (21)
12r 21sc (21)
13r [6sc, 1inc] x3 (24)
14r 24sc (24)
15r 3sc, 1inc [7sc, 1inc] x2, 4sc (27)
16r 27sc (27)
17r [8sc, 1inc] x3 (30)
18r 30sc (30)
19r 4sc, 1inc [9sc, 1inc] x2, 5sc (33)
20r 33sc (33)
21r [10sc, 1inc] x3 (36)
22r 36sc (36)
23r 5sc, 1inc [11sc, 1inc] x2, 6sc (39)
24r 39sc (39)
25r [12sc, 1inc] x3 (42)
26r 42sc (42)
27r 6sc, 1inc [13sc, 1inc] x2, 7sc (45)
28r 45sc (45)
29r [14sc, 1inc] x3 (48)
30r 48sc (48)
31r 7sc, 1inc [15sc, 1inc] x2, 8sc (51)
32r 51sc (51)
33r [16sc, 1inc] x3 (54)
34r 54sc (54)
35r 8sc, 1inc [17sc, 1inc] x2, 9sc (57)
36r 57sc (57)
37r [18sc, 1inc] x3 (60)
38r 60sc (60)
39r 9sc, 1inc [19sc, 1inc] x2, 10sc (63)
40r 63sc (63)
41r [20sc, 1inc] x3 (66)
42r 66sc (66)
43r 10sc, 1inc [21sc, 1inc] x2, 11sc (69)
44r 69sc (69)
45r [22sc, 1inc] x3 (72)
46r 72sc (72)
Close with a sl st and cut the yarn.
Resume the work in white, now working in joined rounds.
47r Make 2 ch, which are our first dc, 71dc, close with a sl st (72).
48r 2 ch, 71 front post/back post dc (72)
Fasten off and cut the yarn, leaving a long tail for sewing.
BEARD
In white color.
1r 6sc in mr (6)
2r 6inc (12)
3r [1sc, 1inc] x6 (18)
4-5r 18sc (18)
Cut the yarn.
Make two more identical pieces, the last one without cutting the yarn when finished.
Join the three pieces together as follows:
6r 9sc in the one with the yarn, 9sc in the second and 18sc in the third, now we return to the second with 9sc and finish with 9sc in the one from the beginning. This brings us to the beginning of the round (54)
7r 8sc, 1dec, 7sc, 1dec, 16sc, 1dec, 7sc, 1dec, 8sc (50)
8r 50sc (50)
9r 7sc, 1dec, 6sc, 1dec, 15sc, 1dec, 6sc, 1dec, 8sc (46)
10r 46sc (46)
11r flatten in half and close both sides of the work with 22sc (22).
Close and cut the yarn, leaving a long tail for sewing.
MOUSTACHE
In white color.
Chain 24 plus one for turning.
Make: 2sc, 2hdc, 3dc, 2hdc, 2sc, 2sl st, 2sc, 2hdc, 3dc, 2hdc, 2sc
Turn the work and on the other side of the chain, crochet 24sl st. When you reach the end, cut the yarn, fasten off, and weave in the remaining tail.
NOSE
In flesh color.
Chain 3 plus one for turning. Work around this initial chain.
1r 2sc, 3sc together, 1sc, 2sc together (7)
2-3r 7sc (7)
BUTTONS (MAKE THREE)
In white color.
1r 6sc in mr (6)
Close with a sl st, cut the yarn, and leave a long tail for sewing.
COLLAR
In white color.
Chain 40 plus two for turning.
Then make eight rounds of dc, working in rows.
ASSEMBLY
Stuff the head with synthetic cotton, with the red yarn from the body, sew it and before closing completely, stuff until firm. Fasten off and weave in the yarn.
Attach the arms to both sides of the body on the third round from the head's join.
Sew the hat so that the back is on the 8th round from the body's join.
Place the beard centered on the face and in the middle of it, sew the nose, securing the mustache at the same time.
Sew the collar folded in half around the join between the head and the body.
Sew the buttons centered on the body and equidistant from each other. Don't forget to embroider a small yellow square as a buckle on the belt at the front.
To make the hat's pompom, repeatedly pass the white yarn through the last stitch of the point, the more times you pass it, the larger it will be.
Finally, embroider the eyes and eyebrows to give life to the face.


,%202%20skeins%20of%20red%20(027),%20black%20(030),%20white%20(002),%20flesh%20(003)%0A2.5mm%20croc...)
Leave a comment
This site is protected by hCaptcha and the hCaptcha Privacy Policy and Terms of Service apply.