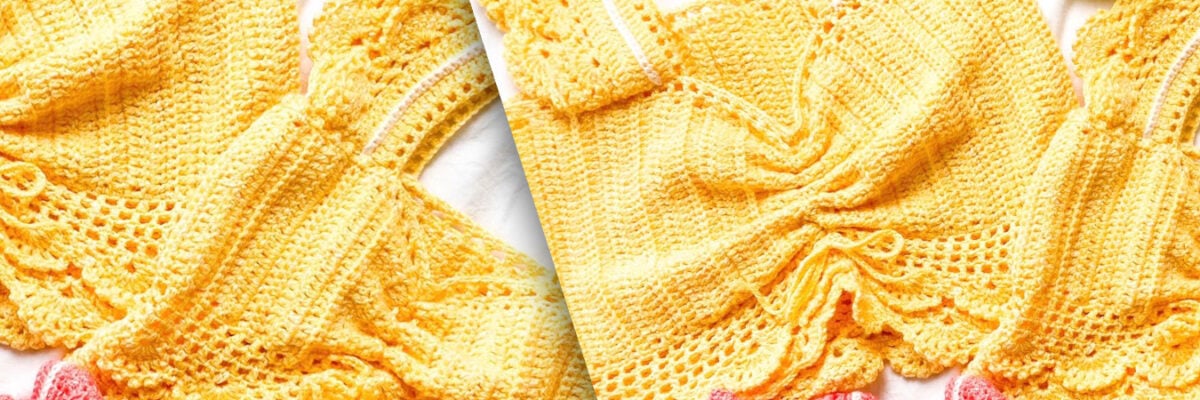
A few months ago, we asked @creacioneskiwihilo to test our new Rubí Mini Universe yarn, and she loved it for a romper for the little one on the way. She also designed a top for herself and her little sister, which we will publish in a few days. Stay tuned!
This project can be the perfect gift for a newborn baby. Shall we get to work?
MATERIALS
Lanas Rubí Mini Universe yarn (002 Ecru – 005 Pink)
2.5 mm Crochet Hook
Yarn Needle
Measuring Tape
Scissors
3 Wooden Buttons
2 Clasps
PATTERN
DIFFICULTY: 2
STITCHES, SYMBOLS AND ABBREVIATIONS
Ch = Chain.
Sl st = Slip stitch.
Sc = Single crochet.
Hdc = Half double crochet.
Dc = Double crochet.
BpDc = Back Post Double crochet.
Picot st.
Flat shell stitch.
Lace stitch.
5-Dc fan stitch.
R = Round/Row.
STEP BY STEP
Part 1: The Bodice.
– We start with a slip knot and crochet 26 Ch. Remember that the last chain is used to make the 1st Sc of the R. –
R1: Make a row of 25 Sc.
R2: Ch 3, turn, and crochet 25 Dc.
R3: Ch 3, turn, and crochet 25 Dc.
R4: Ch 1, turn, and crochet 25 Sc.
R5: Ch 3, turn, and crochet 25 Dc, worked from the back of the piece.
R6: Repeat R2.
R7: Repeat R3.
R8: Repeat R4.
R9: Repeat R5.
R10: Ch 3, turn, crochet 25 Dc. Then cast on 45 Ch, which we will close with 1 Sl st at the other end to start crocheting our piece in the round. Close with a slip stitch and continue crocheting in a circular fashion.
R11: Ch 3, turn, and crochet 70 Dc.
R12: Ch 3, turn, and crochet 70 Dc.
R13: Ch 1, turn, and crochet 70 Sc.
R14: Ch 3, turn, and crochet 70 Dc, worked from the back of the piece.
R15: Repeat R11.
R16: Repeat R12.
R17: Repeat R13.
R18: Repeat R14.
R19: Ch 3, turn, and crochet 70 Dc.
R20: Ch 3, turn, and crochet 70 Dc.
R21: Ch 1, turn, and crochet 70 Sc.
– Divide the work into two parts, i.e., 35 Sc on each side, to make the front and back of the Romper –
Part 2: Front of the Romper.
R22: Ch 3 and start crocheting Dc worked from the back of the piece, decreasing 3 Dc from each side, leaving 29 Dc.
R23: Ch 3, turn, and make 3 decreases on each side, leaving 23 Dc.
R24: Ch 3, turn, and make 2 decreases on each side, leaving 19 Dc.
R25: Ch 1 and turn, crocheting Sc without decreasing (19 Sc).
R26: Ch 3, turn, and make 2 decreases on each side, leaving 15 Dc.
R27: Ch 3, turn, and crochet 15 Dc, decreasing 1 Dc from each side, leaving 13 Dc.
R28: Ch 3, turn, and crochet 13 Dc.
R29: Ch 1, turn, and crochet 13 Sc. Cut the yarn and finish this part.
Part #3: Back of the Romper.
– From R22 to R26, crochet the same as the front part –
R27 and R28: Ch 3, turn, and crochet 15 Dc.
R29: Ch 1, turn, and crochet 15 Sc.
R30 and R31: Ch 3, turn, and crochet 15 Dc.
R32: 15 Sc. Cut the yarn and finish this part.
Part #4: Romper Straps or Sleeves.
Start by making 36 Ch.
R1: Ch 2, crochet 36 Hdc.
R2: Ch 1, crochet 36 Sc.
R3: Ch 2, crochet 36 Hdc.
From R4 to R6, make the Fancy Stitch formed with the Fan Stitch (of 5 Dc) and Picot Stitch.
Finishing
Sew the straps or sleeves to each end of the Bodice, taking approximately 5 St from each corner.
Then, make a Sc around the entire romper and finish with a fancy flat shell stitch.
Finally, attach 3 small wooden buttons at the bottom and two clear plastic clasps at the bottom of the straps that are fastened at the back of the romper.
RESULT