

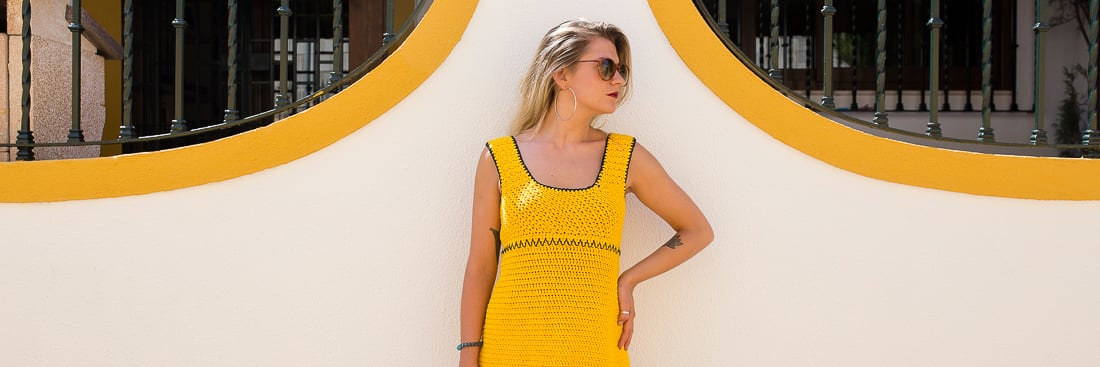
Lovely Sun T-shirt
Exclusive Idealium Design
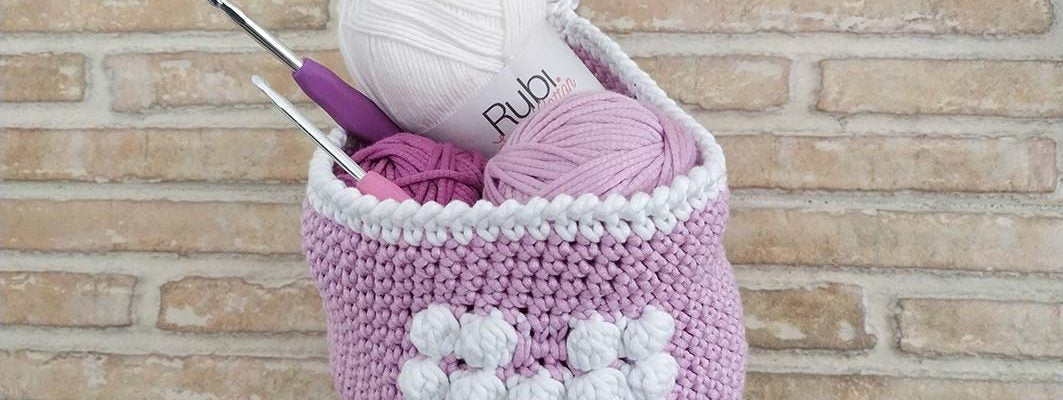
MATERIALS

5 balls of Sunny in the color of the top
1 ball of Super Cotton for details in a different color
Crochet hook size 4
Crochet hook size 5
Yarn needle
Choose your favorite colors through our online store.
FINAL RESULT


Instructions for Size M
Abbreviations:
* CH = chain
* DC = double crochet (yarn over, insert hook, yarn over, pull up a loop, yarn over, pull through 2 loops, yarn over, pull through 2 loops)
* SL ST = slip stitch (insert hook, yarn over, pull up a loop, pull through loop on hook)
* SC = single crochet (insert hook, yarn over, pull up a loop, yarn over, pull through 2 loops)
* HDC = half double crochet (yarn over, insert hook, yarn over, pull up a loop, yarn over, pull through all 3 loops)
* BLO = back loop only (work the stitch by inserting the hook into the back loop only instead of both loops)
* DC2TOG = double crochet 2 together (yarn over, insert hook, yarn over, pull up a loop, yarn over, pull through 2 loops, leaving the remaining 2 loops on hook. Yarn over, insert hook into next stitch, yarn over, pull up a loop, yarn over, pull through 2 loops, yarn over, pull through all 3 loops on hook). This creates a DECREASE.
* 2DC IN SAME ST = 2 double crochet in same stitch (work two or more stitches by inserting the hook into the same stitch). This creates an INCREASE.
Tips:
– The body is worked in the round, closing each round with a SL ST to the first stitch.
– When working with Sunny, use hook size 5. When working with Super Cotton, use hook size 4.
– DC rounds begin with 2 CH before the first stitch.
– HDC rounds begin with 2 CH before the first stitch.
– SC rounds begin with 1 CH before the first stitch.
– In the pattern instructions, the total number of stitches you should have in that round is indicated in parentheses.
PATTERN
A) BODY
Chain 136 with Sunny.
R1 to 5 – 136 DC
R6 – DC2TOG, 66 DC, DC2TOG, 66 DC (134)
R7 – 65 DC, DC2TOG, 65 DC, DC2TOG (132)
R8 – DC2TOG, 64 DC, DC2TOG, 64 DC (130)
R9 – 63 DC, DC2TOG, 63 DC, DC2TOG (128)
R10 – DC2TOG, 62 DC, DC2TOG, 62 DC (126)
R11 – 61 DC, DC2TOG, 61 DC, DC2TOG (124)
R12 – DC2TOG, 60 DC, DC2TOG, 60 DC (122)
R13 – 59 DC, DC2TOG, 59 DC, DC2TOG (120)
R14 – DC2TOG, 58 DC, DC2TOG, 58 DC (118)
R15 – 57 DC, DC2TOG, 57 DC, DC2TOG (116)
R16 – DC2TOG, 56 DC, DC2TOG, 56 DC (114)
R17 – 55 DC, DC2TOG, 55 DC, DC2TOG (112)
R18 – DC2TOG, 54 DC, DC2TOG, 54 DC (110)
R19 – 53 DC, DC2TOG, 53 DC, DC2TOG (108)
R20 – DC2TOG, 52 DC, DC2TOG, 52 DC (106)
R21 – 51 DC, DC2TOG, 51 DC, DC2TOG (104)
R22 – DC2TOG, 50 DC, DC2TOG, 50 DC (102)
R23 – 49 DC, DC2TOG, 49 DC, DC2TOG (100)
R24 – 100 DC
R25 – 100 HDC BLO
R26 – 100 HDC
R27 – 100 SL ST (The tension of this row will determine how tight or loose it fits on the chest).
R28 – 100 SC, inserting hook into stitches of R26.
R29 – 1 CH, repeat sequence [1 SC, 1 DC] (100)
R30 – 1 CH, repeat sequence [1 DC, 1 SC] (100)
R31 to 40 – Repeat instructions from R29 and R30
Fasten off.
B) STRAPS
From the point where we fastened off, skip 6 stitches and reattach yarn, starting to crochet in the 7th stitch.
R1 – 1 CH, 8 stitches repeating [1 SC, 1 DC], DC2TOG, DC2TOG (10)
R2 and 3 – 1 CH, repeat [1 SC, 1 DC] (10)
R4 – 1 CH, repeat [1 SC, 1 DC] for 8 stitches, DC2TOG (9)
R5 – 1 CH, repeat [1 DC, 1 SC] for 7 stitches ending with DC, DC2TOG (8)
R6 to 22 – 1 CH, repeat [1 DC, 1 SC] (8)
You should have 18 cm from the armhole. Start crocheting the strap down towards the other side of the body:
R23 to 39 – 1 CH, repeat [1 DC, 1 SC] (8)
R40 – 1 CH, 2DC IN SAME ST, repeat [1 SC, 1 DC] for 7 stitches ending with SC (9)
R41 – 1 CH, 2DC IN SAME ST, repeat [1 SC, 1 DC] for 8 stitches (10)
R42 – 1 CH, repeat [1 SC, 1 DC] (10)
R43 – 1 CH, repeat [1 SC, 1 DC] (10)
R44 – 1 CH, 2DC IN SAME ST, 2DC IN SAME ST, repeat [1 SC, 1 DC] for 8 stitches (12)
Join the strap to the other side of the body with 12 SL ST from the inside. To know which stitches to sew into, count from the side of the strap where you started crocheting towards the armhole, leaving 12 unworked stitches, then sewing the strap into the next 12 stitches.
To crochet the other strap, place the garment facing the point where we started crocheting the first strap (it will be on your right). Now leave 14 neckline stitches unworked and start crocheting in the 15th.
R1 – 1 CH, DC2TOG, DC2TOG, repeat [1 SC, 1 DC] for 8 stitches (10)
R2 and 3 – 1 CH, repeat [1 SC, 1 DC] (10)
R4 – 1 CH, DC2TOG, repeat [1 SC, 1 DC] for 8 stitches (9)
R5 – 1 CH, DC2TOG, repeat [1 SC, 1 DC] for 7 stitches ending with SC (8)
R6 to 39 – 1 CH, repeat [1 DC, 1 SC] (8)
R40 – 1 CH, repeat [1 DC, 1 SC] for 7 stitches ending with DC, 2DC IN SAME ST (9)
R41 – 1 CH, repeat [1 SC, 1 DC] for 8 stitches, 2DC IN SAME ST (10)
R42 and 43 – 1 CH, repeat [1 SC, 1 DC] (10)
R44 – 1 CH, repeat [1 SC, 1 DC] for 8 stitches, 2DC IN SAME ST, 2DC IN SAME ST (12)
Join to the other side of the body with 12 SL ST from the inside, counting in the same way as the other strap. There are 12 stitches of space in the armhole and 14 stitches of space in the neckline.
C) EDGING
Make a SL ST border in the round on three areas of the top: the neck opening and the armhole openings.
The neck opening will have 14 stitches on each neckline (front and back) + 44 stitches for the strap going up and down (1 stitch per row). Total 116 SL ST.
Each armhole opening will have 12 stitches at the bottom + 44 stitches for the strap going up and down (1 stitch per row). Total 56 SL ST.
D) DETAILS IN ANOTHER COLOR
To make the details in another color, use Super Cotton and hook size 4. Crochet loosely, allowing the stitches to be relatively relaxed so as not to pucker the garment.
1- Neckline. Attach yarn in the neck opening and work a complete round of SC, inserting the hook into the center of each SL ST of the edging.
2 – Armholes. Do the same as the neckline, 1 round of SC in each armhole circle.
3 – Bottom edge. 4 rounds of SC.
4 – Zig zag. Sew the zig-zag detail to the chest. Cut a piece of yarn 6 times the width of the garment and sew with a yarn needle. Locate the 3 points of the triangle to be sewn in the photo. Let's call A the top corner, B the bottom left corner, and C the bottom right corner.
To draw the triangle, the needle movement is:
– From bottom to top, pass the needle through C
– From top to bottom, pass the needle through A
– From bottom to top, pass the needle through B
– From top to bottom, pass the needle through A
– From bottom to top, pass the needle through B. This step is the first for the next triangle to the left.


