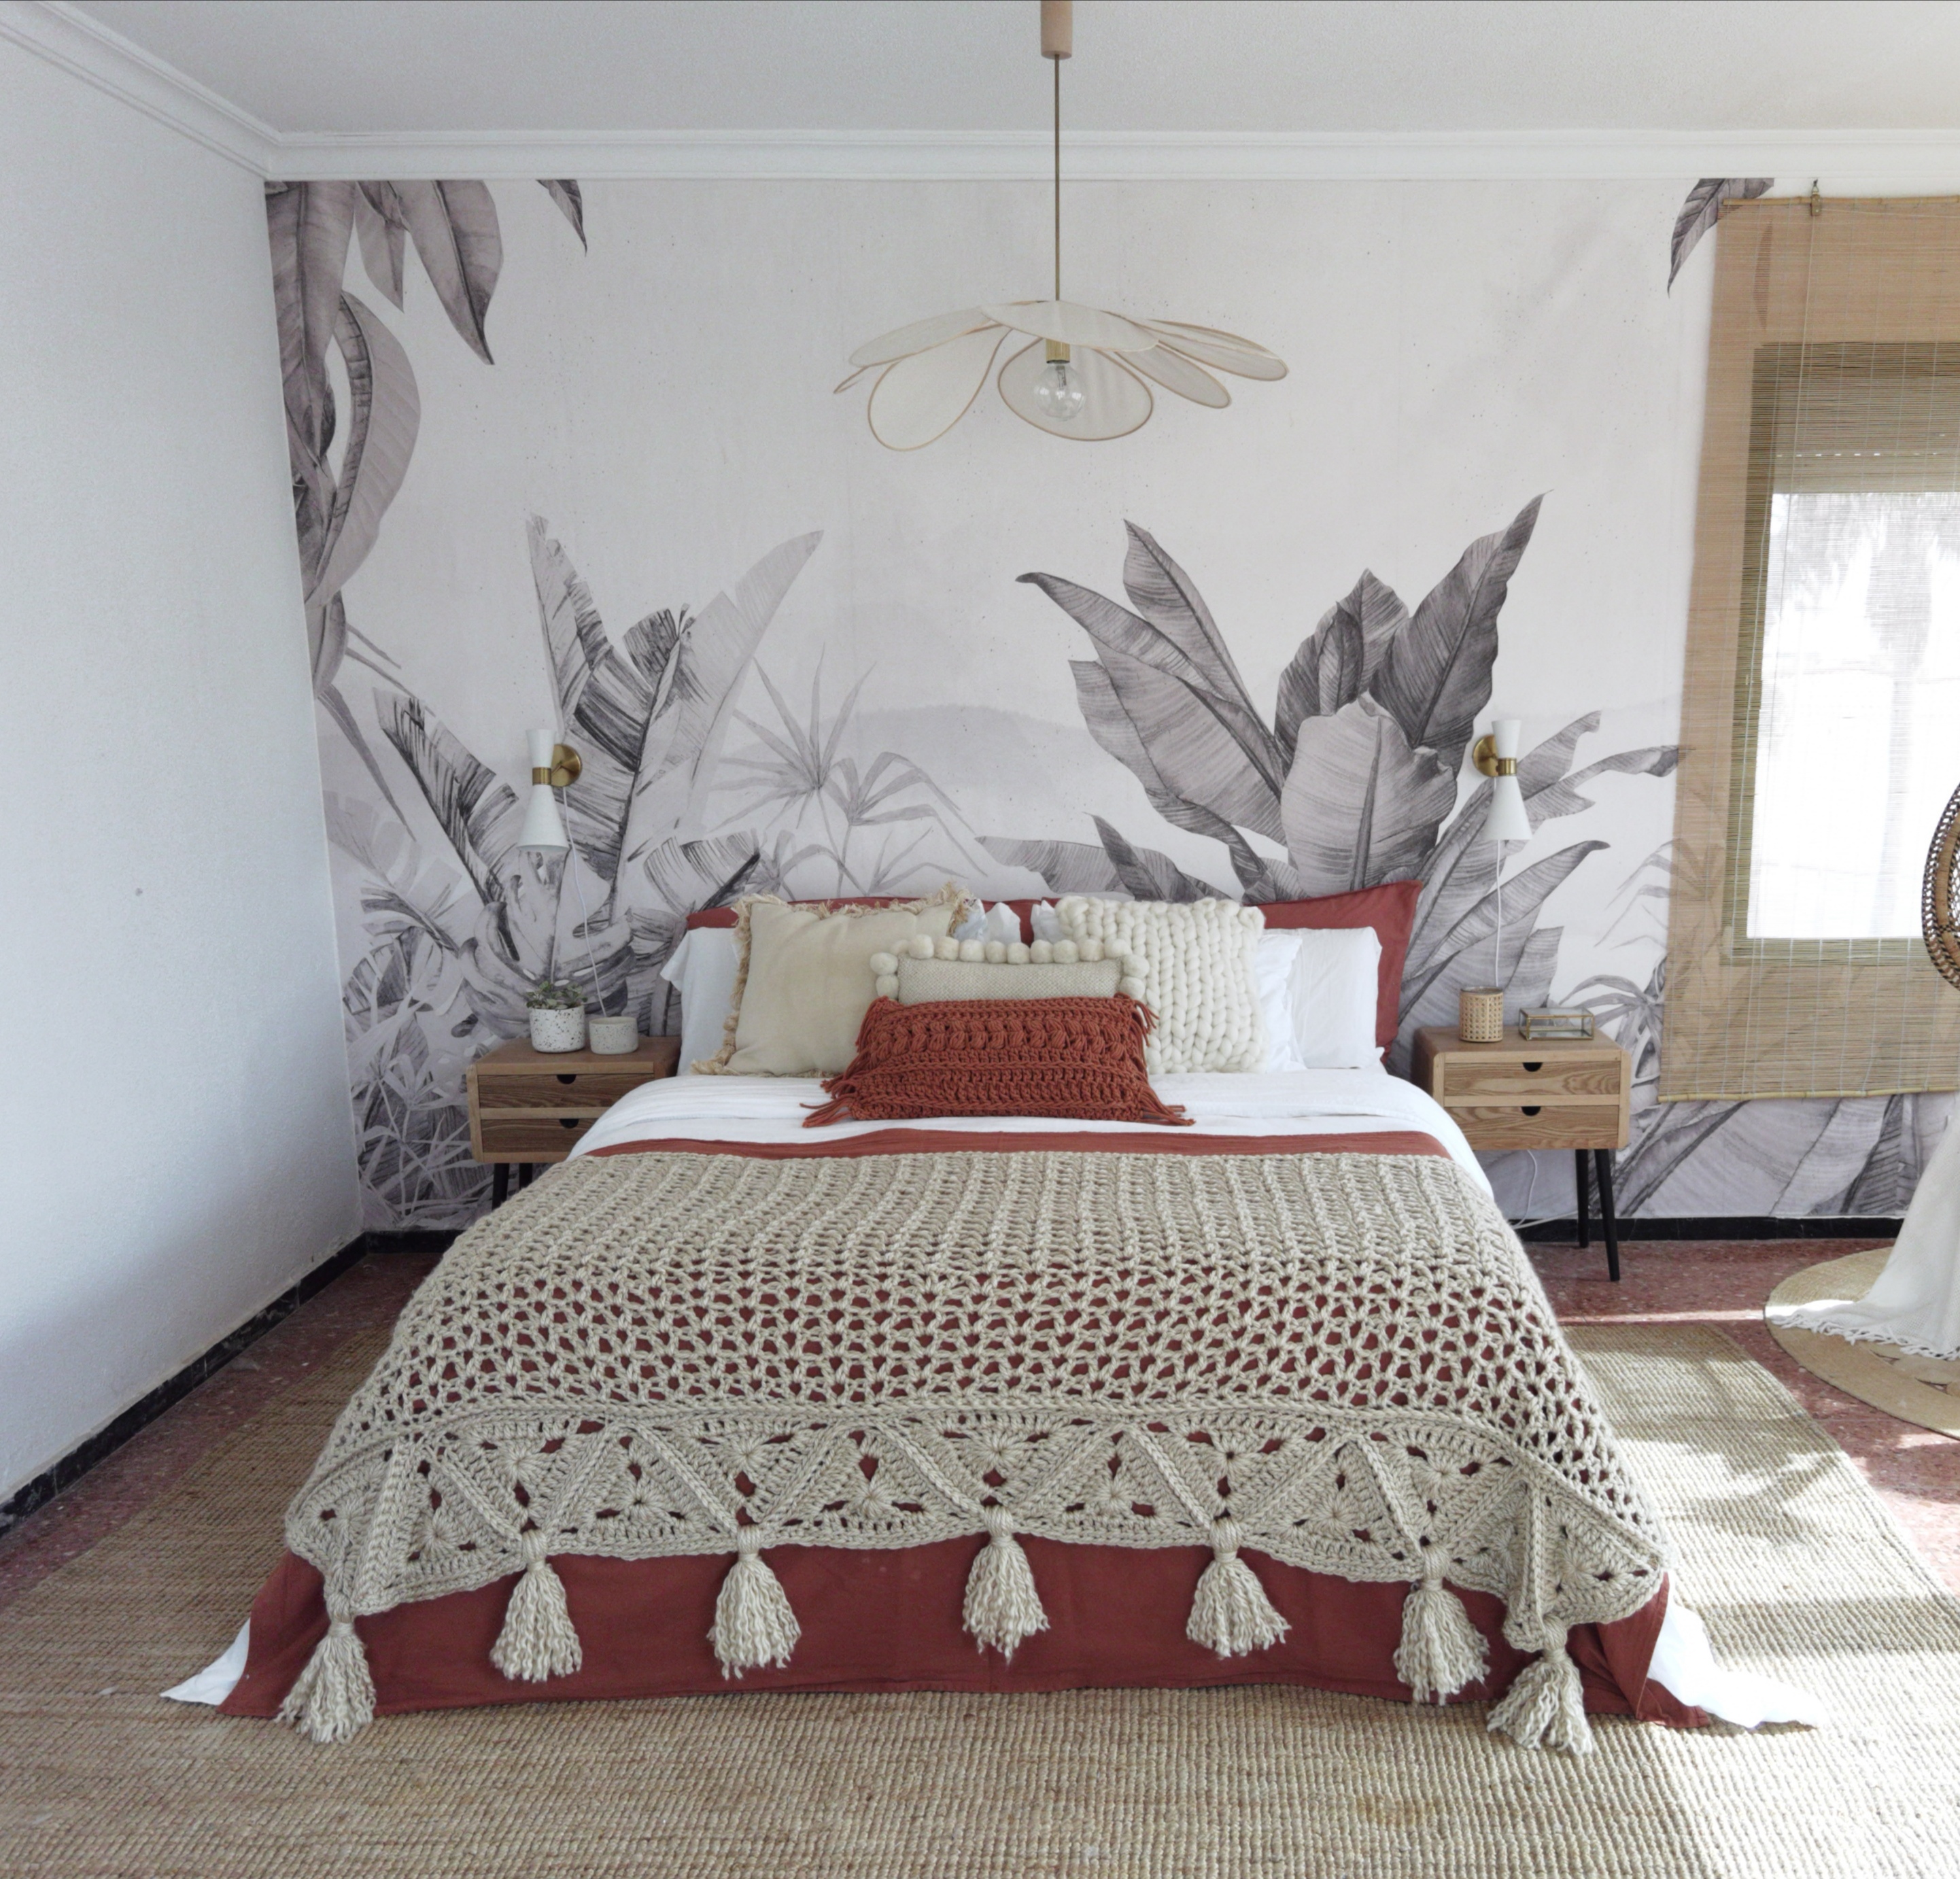
The Mantilda blanket is an elegant and impactful bed runner blanket, capable of completely transforming any room. This throw can also be used as an auxiliary blanket that we can place on the bed or sofa, as it serves the purpose of providing warmth when needed and contributing to the decoration.
This wool blanket is a perfect accessory that cannot be missing in your home. It is woven with Merino and Acrylic wool, and the design is by Anuskayhome.
The measurements of this bed blanket are 150 x 240 cm and it consists of granny triangles and a rectangular base which will be the body of our bed runner, knitted in a triangle lace stitch.
MATERIALS
The materials needed to knit the Mantilda bed runner blanket are:
BED RUNNER PATTERN
GRANNY TRIANGLES
R1-
Make a magic circle, chain 1, and work 5 sc inside the circle, close the circle with a slip stitch in the first stitch.
R2-
Chain 3 (this will count as the first stitch) and work 4 dc inside the circle, so you will have 5 stitches in total.
Continue with
Chain 4
5 dc inside the circle
Chain 4
5 dc inside the circle
Chain 2
And 1 dc in the third chain of the first stitch of the round to close it.
R3-
Chain 3 (counts as the first stitch) and work 2 more dc in that space.
Now work 5 dc over each dc of the previous round,
3 dc in the space, chain 4, and 3 dc in the space.
Again, work 5 dc over each dc of the previous round,
3 dc in the space, chain 4, and 3 dc in the space.
Again, work 5 dc over each dc of the previous round, 3 dc in the space.
Chain 2
And 1 dc in the third chain of the first stitch of the round to close it. Cut the yarn.
Fasten off and set aside.
Now cut 8 strips of 30 cm.
Lay the triangle flat and pass the doubled strips through the hole so that you have a tassel of approximately 15 cm. Fasten off by wrapping a couple of turns 3 cm from the edge of the tassel, knotting and unraveling the tassel strips to make it fluffy.
In total, we will make 14 granny triangles for this size (approx. 2m).
Set aside.
BODY
R1-Chain stitch until the desired length of the blanket.
R2-Chain 3 (the 3 starting chains will always count as the first stitch of the round). In the third starting chain, work 1 dc, chain 2, 1 dc. Skip 2 chains and in the third, repeat the sequence (1 dc, ch 2, 1 dc) until the end of the round, making a single dc in the last chain of the first round.
R3-Chain 3 (counts as the first stitch of the round) and between the 2 chains of the previous round, work the sequence (1 dc, ch 2, 1 dc) until the end of the round, finishing with a single dc in the last chain of the previous round.
R4-Repeat round 3 until the desired width of the blanket is reached (in this photographic example, the blanket has 22 rounds) about 120 cm.

Final body round.
Once the body is finished, work a very loose slip stitch around the entire perimeter.
JOINING THE GRANNIES
Place the grannies along a flat surface, with one granny pointing up and another pointing down. Work a loose slip stitch to join the grannies along their three sides, picking up the strand that faces inwards on each one. This will create a relief as they are joined.


Finally, join the strip of grannies to the body of the blanket in the same way, also with loose slip stitches.

FINAL RESULT


